How to Add a Subheading to Your WordPress Post
The easiest way to figure out what your heading should be in WordPress is to use a template. In this case, it’s about how to add a subheading in WordPress to cover the information you want to display. But before that, you need to create your header. Here’s how to add a subheading in WordPress.
To get started, you will need to open a text editor such as Notepad. Next, open your default WordPress template and add the contents below. If you are using the default template, just copy and paste the content into the text editor, but if you are using a template that came with your website, you need to modify the contents to match.
For instance, if your website had a header with the text “My Company Name”, you would modify it to read “My Company Name – Subheading 2”. It might take a little bit of trial and error to get used to but in the end it will be well worth it.
When adding subheadings to your WordPress theme, always make sure that you have inserted them before the closing of the previous one. This will ensure that they are visible when you edit the contents of your page. Once you are happy with the visual appeal of your page, you can modify the contents of your header. If you are using WordPress as your CMS, then this is quite easy to perform by going to Appearance and then Themes.
You can also change the appearance of your editor whenever you like. By clicking on the icon that looks like a crosshair you can open a new editor. You will see that there are various options for fonts, colors, and other editor controls. You can easily find how to add subheadings to your blog by visiting Appearance and then Themes.
Adding own styles
Some people prefer to add their own styles to the editor, however, if you do this then you should make sure that your code editor allows you to save the modified styles as well as re-size and hide them as needed. Another option is to add your own template via your editor’s “Templates” or options. With regards to how to add subheadings to WordPress, you will notice that you can either add them as plain text, use a pre-defined template or add code within your template. If you are using a pre-defined template, then you simply select the appropriate headings and fill in your text.
If you were to add subheadings to your blog, then the first paragraph would be your main title and in the second paragraph, your summary. Your third paragraph would contain your information regarding your business and what products or services your offer. Your fourth paragraph would contain a sales pitch. Finally fifth and final paragraph could contain just a link to your website. Once added, your main title, summary and sales pitch will appear below your main header.
How to add a heading to your post
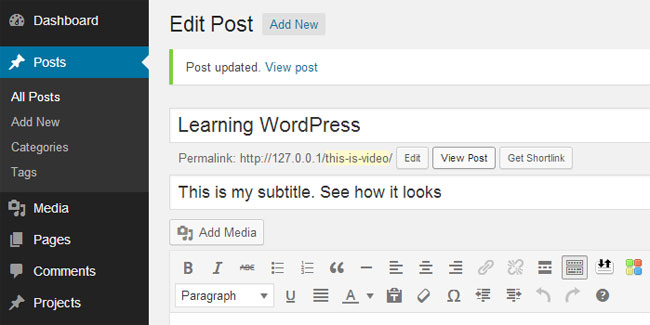
To add a heading to your post, first login to your WordPress editor and then open the Post Options. Under the Post Options menu, click on the “ibility” tab. This will open the Editor tab, where you will find a drop down menu for how to add a subheading. Select “yes” and you will be asked to enter a title for your post.
Once you have completed entering your text, click on Save, to which your changes will be applied immediately. It is important to make sure that you enter your subheadings into the format specified by your WordPress editor, otherwise your website may display all kinds of garbled text. Your WordPress editor will display the subheadings you have chosen in their format. It is then a matter of clicking on the edit icon to add subheadings to your post.